Overview
The World Creator Bridge for Cinema 4D allows you to seamlessly import your terrain creations into Cinema 4D for use in your Cinema 4D projects.
TABLE OF CONTENTS
Installation
Copy the wc_bridge folder found in the downloaded bridge file, and paste it into the 'plugins' folder of your Cinema 4D installation.
To launch the bridge interface in Cinema, go to the Extensions menu and select World Creator Bridge.
Parameters
- XML File
Locate the .xml file for the sync project you wish to use. By default, for WC 22 and above, it is located in
[SYSTEM DRIVE]:\User\Documents\World Creator\Sync\ - Obj Name
Specify the prefix for all terrain objects created by the bridge. Modify this setting if you want to import a second terrain, otherwise, the old one will be replaced. - World Scale
Specifies the scale factor for the terrain. - Height Scale
Specifies the scale factor for the height of the terrain. - Subd Viewport/Render
Specifies the amount of terrain subdivision. - Octane Texture Displacement
Enabling this option adds a second plane to the scene that utilizes Octane's Voxel Displacement to render the terrain. A terrain with a displace modifier that is disabled for rendering will still be present in the scene to enable the scattering of meshes. - Import Layers
Toggle between using individual terrain layers or a baked colormap in the generated material. - Adjust Clipping
This option automatically adjusts the clipping distance of the viewport camera so that the entire terrain becomes visible. (This only modifies the viewport camera, not the one used for rendering!) - Reset Objects
Allows you to protect any changes made to specific terrain objects from the synchronization process.
Note that this only works if you keep the original names
- Reset Materials
Allows you to protect any changes made to specific material layers from the synchronization process.
Note that this only works if you keep the original names! - Renderer
Allows selection of the render engine used by the bridge for material creation.- Standard - uses color-based shaders exclusively, without support for layers
- Redshift - complete support for layers
- Octane - supports up to 12 layers of materials
Workflow Example
This example demonstrates how to render terrain in Cinema 4D using Octane. The Canyon sample file that comes with World Creator will be used. These steps can be applied to any other World Creator project.
Sync from World Creator
To export all relevant data from World Creator, press the sync button located in the application bar at the top of the main panel.

The World Creator scene before the sync
Sync into Cinema 4D
To open the bridge interface in Cinema 4D, select World Creator Bridge from the Extensions menu. Select Octane as the renderer and click on the Synchronize button.
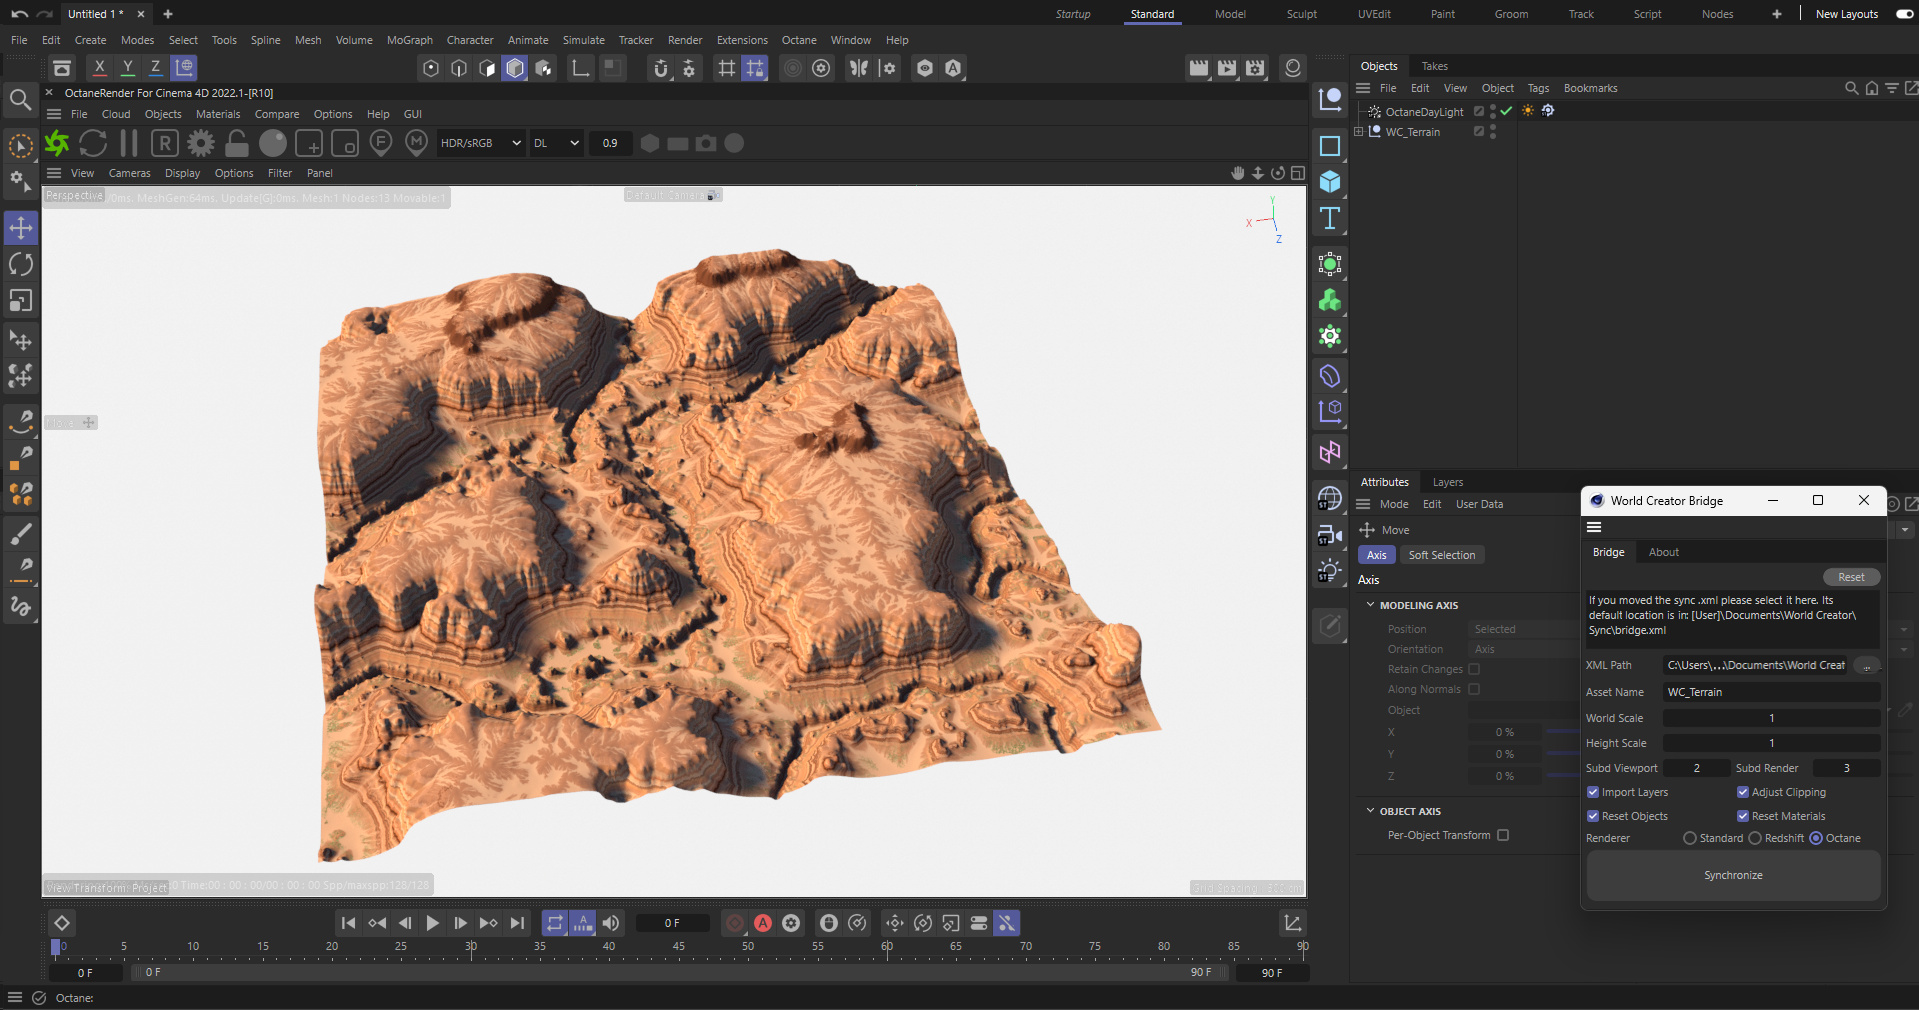
Synced terrain in Cinema 4D
Since we had Import Layers activated we now have all material layers from World Creator as individual submaterials, which we can further modify in Cinema 4D.
Please note that the Octane bridge can support a maximum of 12 layers.
To add a winter look to the terrain, transform the top sediment layer into snow. Do this by selecting the Sediment material and adding a MixTexture node with a white color RgbSpectrum between the colormap and the output. Although World Creator could provide a more accurate result, we will keep the process within Cinema 4D for the purpose of this guide.
Tip: Right-click on a node and choose Auto-arrange to simplify material cleanup.

Synced terrain with altered splat maps in Cinema 4D
The terrain should now look something like this.
One significant advantage of utilizing the bridge is the faster iteration speed achieved between World Creator and Cinema 4D. To demonstrate this concept more effectively, modify the seed of the entire terrain within World Creator to 1. Doing so will create a different scene that adheres to the same design patterns as our original terrain.
To preserve the snow cover changes in our Cinema 4D materials, we need to deactivate the Reset Materials parameter in the bridge options. The bridge subsequently scans the terrain materials for existing subgroups and retains any changes made to them, while also reloading all the relevant new textures. It is crucial to preserve the original names of the subgroups for this to work.
Although we are using this for a relatively simple modification, it is possible to use this feature with more complex materials such as tri-planar shaders while maintaining the same iteration speed between World Creator and Cinema 4D.
The same workflow is also available on the object level, where you can add additional modifiers to the terrain mesh or even make changes to the mesh itself. The only condition is that you retain the Subdivision and Displacer modifiers along with the original mesh name.

Material changes applied to a freshly imported terrain with a different seed
After modifying the seed and resyncing the terrain into Cinema 4D, you should now see the image above.
Next: Using the Unity Engine Bridge